Introduction
In this post we will discuss how to use Tkinter to switch between views with a hierarchical structure. This project, in particular, has a hierarchical treelike structure with a peripheral settings page. Our program allows us to switch between multiple views without requiring a new view for each page. This process will be shown in our Multiview section.
We also explore Tkinter styles. We demonstrate how to create CSS like stylesheets with Tkinter through the use of classes. The method we utilize can apply to the entire project, but still allows us to keep styles separate from other parts of the program.
Project Structure
Before we discuss things in detail it is important to understand the overall structure. In this section we outline our program's views and then file structure.
Our views consist of hierarchical pages starting with the homepage followed by an object page and finally a detail page. We also have a settings page which is a periphery page accessible by all other views. We can see this structure in Figure 1.
Below we can see the project file structure. We use the MVC software architectural pattern as a guideline for structuring our files.
multiview/
| - multiview/
|   | - __init__.py
|   | - application.py
|   | - models.py
|   | - styles.py
|   | - views.py
| - multiview.py
| - README.md
Within this structure multiview.py calls application.py which is the controller for the entire program. Here is a snippet of the code in application.py:
import tkinter as tk
from tkinter import ttk
from . models import DataModel
from . import views as v
from . styles import StyleSheet


class Application(tk.Tk):
    """Controller for model and views."""

    def __init__(self, *args, **kwargs):
        super().__init__(*args, **kwargs)

        self.wm_title("Multi View")
        self.geometry("600x400")

        self.callbacks = {
            ...
        }

        # keep track of view object and detail page
        self.active_view = {
            'object': None,
            'detail': None,
        }

        self.datamodel = DataModel()

        self.stylesheet = StyleSheet()

        # create view objects
        self.homepage = v.HomePage(self, self.callbacks)
        self.objectpage = v.ObjectPage(self, self.callbacks)
        self.detailpage = v.DetailPage(self, self.callbacks)
        self.settingspage = v.SettingsPage(self, self.callbacks)

        # initialize view
        self.homepage.grid(row=0, column=0, sticky="nsew")
        self.objectpage.grid(row=0, column=0, sticky="nsew")
        self.detailpage.grid(row=0, column=0, sticky="nsew")
        self.settingspage.grid(row=0, column=0, sticky="nsew")

        # configure rows and columns with weight
        self.grid_columnconfigure(0, weight=1)
        self.grid_rowconfigure(0, weight=1)

        # start with Homepage on top
        self.show_view(self.homepage)
We see that we import data from the files models, styles, and views. In the Application class we create objects associated to classes in these files. The attribute self.datamodel stores our model while self.stylesheet stores a Tkinter stylesheet designed to serve the same purpose as CSS. We also create four attributes storing objects associated to our view.
Notice that our view objects all share the same parent widget. Notice as well that we use grid to put them all in the same spot of the root window. What we have is four distinct views each placed on top of each other. We use the method self.show_view to choose which view is displayed on top. In our case we always start the program with the homepage on top.
Multiview
The primary goal of this project is to show how to switch between multiple views in Tkinter. There are two primary ways this can be accomplished. The first method is to create multiple views and only display the active view. The other strategy is to have only one view and destroy inactive views.
This project uses the first method. We have four views with the grid geometry manager putting them in the same place. By using the show_view method which simply calls tkraise we are able to change which view shows up on top.
def show_view(self, view):
    """Displays the inputted view at the top."""

    view.tkraise()
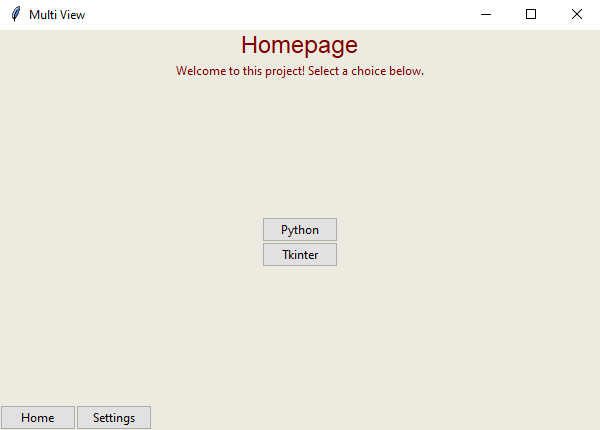
Now Let's take a look at our homepage
We have a footer which allows us to return to the homepage or go to our settings. Alternatively, we have two buttons in the center of the view. One button says Python, the other Tkinter. Both of our center buttons take us to the same view our object page. The difference is the content. The ability to separate the view from the content is important so we can avoid creating an excessive number of objects.
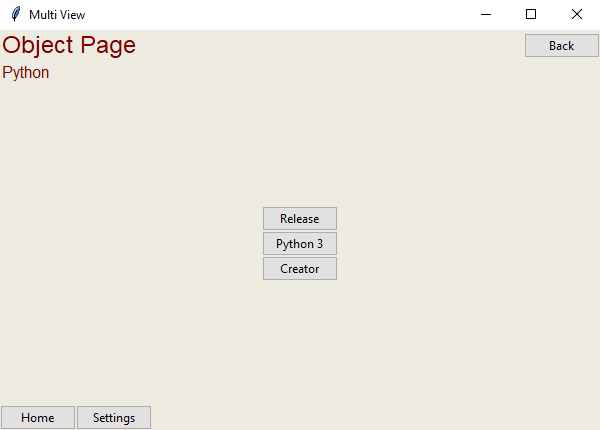
Suppose now we chose the button labelled Python:
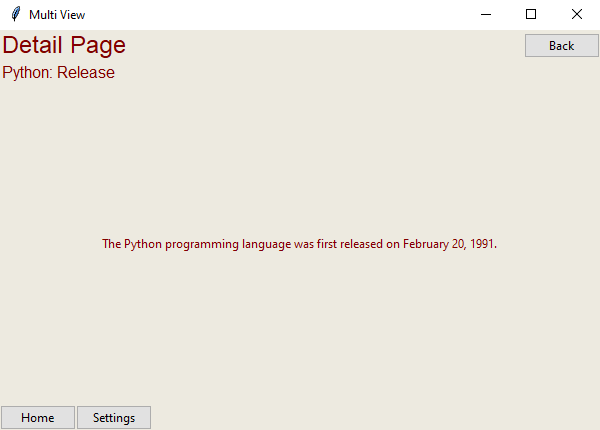
This takes us to the our view of the object page with the content specifically for Python. Here we can see more buttons in the center which themselves link to the view with the detail page. In this case we have three options. Selecting the first option brings us to our view with the detail page with info about the Python release date.
Ignoring our settings view we have the following options to traverse when moving between views.
We can see our choices clearly here. From the homepage we can click either Python or Tkinter and from there we have 3 detail pages connected to the Python branch and 2 detail pages connected to the Tkinter branch.
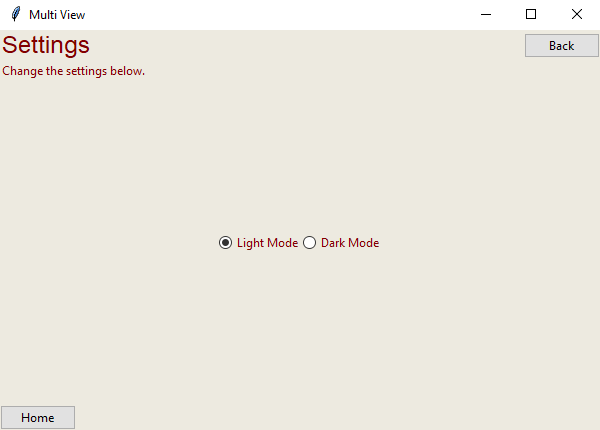
Now, aside from our hierarchical views, we also have a peripheral view for settings. This can be accessed using the Settings button in the footer of each view. Clicking this button we get our settings page.
We will discuss what our settings page does in more detail in the Stylesheet section. Before we do this, however, let's discuss a little more about how switching views works.
Starting with the homepage view, we have a variety of buttons we can choose from which take us to a different view. When we click the Python button, it takes us to our object page view containing the data related to Python. The relevant code in our HomePage class is in the __init__ method:
# buttons to go into the frame
self.objects = self.callbacks['get_objects']()  # get objects as a list

for obj in self.objects:
    ttk.Button(self.frame, text=obj.title(), command=partial(self.display_object_view, obj)).pack()
Essentially, we request Application to get us the object information from our DataModel class. We then use this information to create Tkinter buttons. We also attach a command to the button to call the method display_object_view:
def display_object_view(self, obj):
    """Opens Object Page corresponding selected button's object."""
    self.callbacks['display_object_view'](obj)
When called this method requests that Application use the object obj in a call to the display_object_view method in Application
def display_object_view(self, obj):
    """
    Displays the object view corresponding to input at the top.

    :arguments
    ----------
    obj : string
        name of asssociated object to be displayed in the Object Page
    """

    self.active_view.update({'object': obj, 'detail': None})
    self.objectpage.refresh_page(obj)
    self.show_view(self.objectpage)
This method tells Application that the hierarchical page is obj, it calls the object page view to refresh based on the selected object, and finally we change the view.
The process of going from object page to detail page is fairly similar except we need to know which object page we are in. That is why we store this data in the active_view attribute.
When moving back up the hierarchy we rely on the active_view attribute. This tells us explicitly where in the view hierarchy we are and how to step back. It is similarly important to keep track of the active_view when going to the settings page so we can go back to exactly where we were.
Stylesheet
In Tkinter there are two primary ways to style widgets. We can directly style them or indirectly style them. With the standard widgets we are required to style them directly. With themed widgets we can indirectly style widgets.
One of the goals of this project was to create a Tkinter stylesheet that works similar to CSS. CSS is an incredible styling system used in web design. The way CSS works is that you can implement styles to an HTML element by targeting a combination of the element's tag, class, or id. We will create our stylesheet to target a widget by its type (similar to the tag) and style attribute (similar to a class).
Our stylesheet is in the file styles.py. The code is below:
import tkinter as tk
from tkinter import ttk


class StyleSheet(ttk.Style):
    """
    The StyleSheet class holds the default styles and
    has methods allowing the application to change select styles.
    """

    def __init__(self, *args, **kwargs):

        super().__init__(*args, **kwargs)

        self.configure('masthead.TLabel', font=('Helvetica', 18))
        self.configure('header.TLabel', font=('helvetica', 12))

        self.set_theme('light')

    def set_theme(self, theme):
        if theme == 'light':
            self.set_theme_light()
        else:
            self.set_theme_dark()

    def set_theme_light(self):
        bg = '#EDEAE0'  # Alabaster
        text_color = 'maroon'

        self.set_background_color(bg)
        self.set_label_color(text_color)

    def set_theme_dark(self):
        bg = '#4E6E81'  # Aegean Blue
        text_color = '#F0EFE7'  # White Dove

        self.set_background_color(bg)
        self.set_label_color(text_color)

    def set_background_color(self, bg):
        self.configure('TFrame', background=bg)
        self.configure('TLabel', background=bg)
        self.configure('TButton', background=bg)
        self.configure('TRadiobutton', background=bg)

    def set_label_color(self, text_color):
        self.configure('TLabel', foreground=text_color)
        self.configure('TRadiobutton', foreground=text_color)
It should be noted that while this structure will look significantly different from pure CSS, it accomplishes a similar purpose. To create the simplest form for our stylesheet, we have the StyleSheet class inherit from ttk.Style. This allows our controller Application, which created a StyleSheet object in its __init__ method, to have complete access to the ttk.Style class. From here it is a matter of referencing the correct widget with the correct associated class. For example,
self.configure('masthead.TLabel', font=('Helvetica', 18))
targets all Label widgets with a style of masthead. One example from the HomePage view which will apply this style is:
self.masthead_title = ttk.Label(self.masthead, text='Object Page', style='masthead.TLabel')
What we have discussed so far is in our stylesheet's __init__ method. This is a great location for setting styles which will stay constant throughout the entire program. If, however, we need more flexibility we can still use other methods to make adjustments.
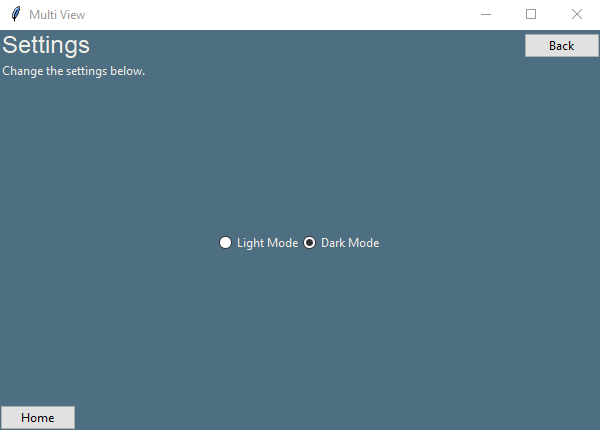
In our settings view we saw a Radiobutton widget with options for Light Mode and Dark Mode. We are using the light mode as the default. Instead of directly initializing the light mode in our __init__ method, however, we call the set_theme method with the light parameter, which allows us to reduce code redundancy. Thus, we only need one section for determining how our light mode behaves.
While this is just one aspect of styles it is pretty neat how we can split style from code similar to what we do with CSS. For more information on how to reference ttk widgets for styling click here.
Below we can see our settings page with dark mode enabled. This style is applied across the entire project.
Code
The code for this project is hosted on GitHub.
Conclusion
In this project we used Tkinter to move between multiple views and create a CSS-like stylesheet.
Our views used a treelike hierarchical structure to showcase the flexibility of view swapping. The change of view was accomplished through putting the active view on top while the other views hide below it, such as you could expect with a stack of paper.
Our Tkinter stylesheet utilizes a class structure to inherit from the base ttk.Style class. This allows us to build styles directly on top of our class and add methods to change styles as needed.
One issue I ran into while trying to style my project is Tkinter themes. Depending on your theme, certain features may not be accessible for adding a style to. Other than this, creating a stand-alone stylesheet with Tkinter works wonderful and I intend to use this framework for my larger projects.
Overall, this project shows the power of Tkinter when it comes to changing views and how to cleanly use styles without cluttering up other parts of the program.
Add a new comment